Indulge in Nostalgia: Your Journey to Homemade Dr Pepper Ice Cream
There's something uniquely comforting about classic soda fountain treats, a gentle whisper of simpler times. Imagine taking that nostalgic feeling and transforming it into a luxurious, creamy dessert. We're talking about
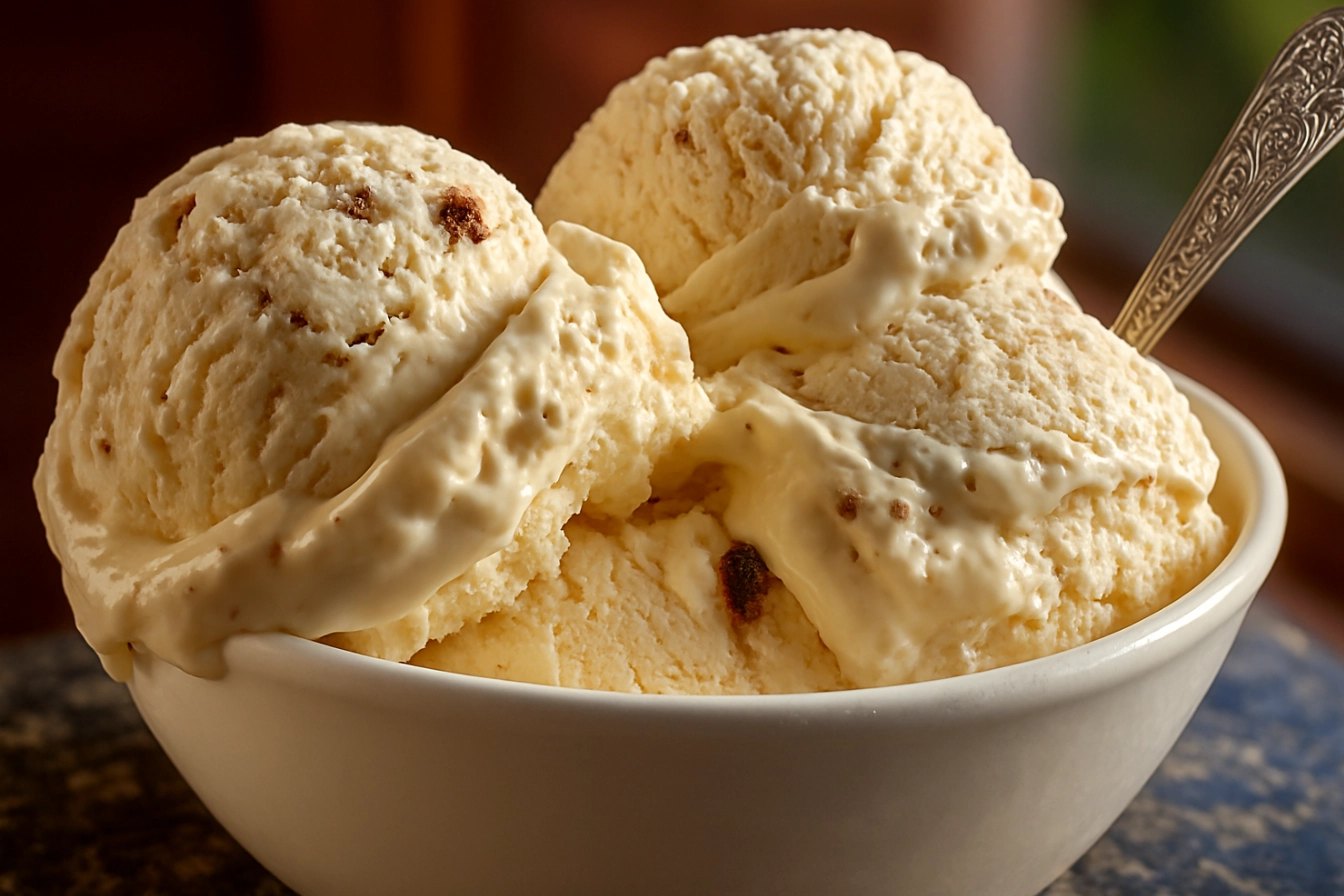
dr pepper ice cream – a whimsical creation that beautifully marries the iconic, multi-layered flavor of Dr Pepper with the irresistible indulgence of homemade ice cream. If you've ever dreamt of a frozen treat that’s both refreshingly familiar and surprisingly sophisticated, get ready to embark on a delightful culinary adventure.
The idea of blending a beloved soda with ice cream might sound unusual, but the results are nothing short of spectacular. This isn't just a basic vanilla ice cream with a splash of soda; it's a carefully crafted dessert where Dr Pepper's distinctive spice, fruit, and caramel notes are elevated and enveloped in a velvety, rich texture. Whether you're a long-time fan of the bubbly beverage or simply searching for an exciting new dessert to impress, this easy no-churn recipe promises an unforgettable experience.
The Allure of Dr Pepper: A Symphony of Flavors in Frozen Form
What makes Dr Pepper so special? Beyond its widespread popularity, it's the beverage's enigmatic complexity that truly sets it apart. The Dr Pepper company famously guards its secret blend of 23 flavors, making it a delicious mystery that has captivated palates for generations. While the full list remains a closely held secret, popular speculation and common tasting notes suggest a fascinating array including cherry, almond, vanilla, caramel, blackberry, ginger, and even subtle hints of pepper and plum.
When these intricate flavors are concentrated into a frozen treat, something magical happens. The bold, tangy, and sweet profile of Dr Pepper transforms into a smooth, creamy delight that still carries its signature kick. Many who taste homemade
dr pepper ice cream are pleasantly surprised by how distinctly Dr Pepper it tastes, yet how perfectly it harmonizes with the richness of heavy cream. The notes of cherry, almond, and vanilla, which are often the most discernible even in the soda itself, truly shine through in this dessert, creating a flavor profile that is both unique and utterly addictive. If you're curious to dive deeper into how these elements contribute to the overall experience, you'll love exploring how each flavor plays a role in your homemade creation. To truly grasp the depth of its unique taste, consider learning more about how these distinct elements come together in your homemade dessert:
Unlock the 23 Flavors: Make Your Own Dr Pepper Ice Cream.
Why Homemade Dr Pepper Ice Cream is a Must-Try
The journey to creating your own
dr pepper ice cream often begins with a spark of curiosity, perhaps inspired by a limited-edition store-bought version or a friend’s casual suggestion. What seems like a quirky idea quickly blossoms into an "aha!" moment when you realize the potential for a truly exceptional dessert. The beauty of this recipe lies not just in its unique flavor, but in its surprising simplicity. Forget complicated ice cream makers, rock salt, or endless churning; this is a no-churn recipe, making it accessible to even the most novice home cooks.
The satisfaction of whipping up a batch of something so distinct and delicious with minimal effort is incredibly rewarding. It’s the kind of dessert that sparks conversation, brings smiles, and offers a refreshing change from typical ice cream flavors. Whether you're looking for a standout dish for a gathering, a comforting treat after a long day, or simply an excuse to experiment in the kitchen, homemade
dr pepper ice cream is a fantastic choice. It delivers a rich, creamy texture and a perfectly balanced sweetness that complements the soda's complex notes, creating a luxurious dessert that feels incredibly special.
Your Easy No-Churn Dr Pepper Ice Cream Recipe
Creating this delightful frozen treat is far simpler than you might imagine. With just a few key ingredients and some basic kitchen tools, you’ll be on your way to enjoying a scoop (or two!) of homemade
dr pepper ice cream.
Gather Your Ingredients & Tools
To achieve the best results, ensure all your ingredients are well-chilled before you begin.
Key Ingredients:
- 14 oz (1 can) sweetened condensed milk, *cold*
- 12 oz (1 can) Dr. Pepper, *cold* (freshly opened is best to maximize fizz)
- 2 cups heavy cream (also known as whipping cream), *cold*
- Optional: 1/2 teaspoon vanilla extract (enhances creaminess)
- Optional: A few drops of red food coloring (for a more vibrant cherry hue)
Tools Needed:
- 10x5x3-inch loaf pan or a similar freezer-safe container (for freezing)
- Stand mixer with whisk attachment, or a hand mixer and a large mixing bowl
- Silicone spatula or offset spatula
- Measuring cups and spoons
Step-by-Step Instructions for Creamy Perfection
Follow these simple steps to create your own batch of delicious
dr pepper ice cream.
- Chill the Equipment: Begin by placing your loaf pan, mixing bowl (if using a hand mixer), and whisk attachment in the freezer for at least 20-30 minutes. Chilling your equipment helps the heavy cream whip up more effectively and ensures a smoother, more stable mixture.
- Combine Dr Pepper and Sweetened Condensed Milk: In a medium mixing bowl, pour in the cold sweetened condensed milk. Slowly, and in a steady stream, add the cold Dr. Pepper. Stir gently with your silicone spatula until just combined. The key here is to stir slowly to minimize excessive bubbling, which can impact the final texture. If using food coloring, add it now and stir until evenly distributed.
- Whip the Heavy Cream: Remove your chilled mixing bowl and whisk attachment from the freezer. Pour the cold heavy cream into the bowl. Begin whipping on medium-low speed, gradually increasing to medium-high. Continue to whip until stiff peaks form. The cream should be thick and hold its shape when you lift the whisk. Be careful not to over-whip, or it may become grainy.
- Fold the Mixtures Together: This is a crucial step for achieving that signature no-churn creaminess. Add about one-third of the whipped cream to the Dr Pepper and condensed milk mixture. Gently fold it in using your silicone spatula until mostly combined. This lightens the Dr Pepper mixture. Then, add the remaining whipped cream and fold very gently until no white streaks remain. The goal is to incorporate the ingredients without deflating the air from the whipped cream. For a deeper understanding of the unique blend of flavors you're working with, especially the prominent cherry and almond notes that shine in this recipe, check out this related article: The Unexpected Delight: Dr Pepper Ice Cream with Cherry & Almond Taste.
- Transfer and Freeze: Pour the entire mixture into your chilled loaf pan. Use your spatula to smooth the top. You can gently tap the pan on the counter a couple of times to release any trapped air bubbles. Cover the pan tightly with plastic wrap or aluminum foil.
- Freeze Until Firm: Place the covered loaf pan in the freezer for at least 6-8 hours, or preferably overnight, until the dr pepper ice cream is completely firm.
- Serve and Enjoy: Once frozen, scoop out your homemade Dr Pepper ice cream and serve immediately. Garnish with a maraschino cherry, a dollop of whipped cream, or a drizzle of chocolate syrup for an extra touch of indulgence.
Tips for the Best Dr Pepper Ice Cream Experience
To ensure your homemade
dr pepper ice cream turns out perfectly every time, keep these tips in mind:
- Keep it Cold: The colder your ingredients and equipment are, the better your heavy cream will whip, and the smoother your ice cream will be.
- Mind the Fizz: While some carbonation is part of the Dr Pepper charm, too much can create an icy texture. Stirring slowly in Step 2 helps reduce excess bubbles. You can also let the Dr Pepper sit open for 5-10 minutes to de-fizz slightly before mixing, though this is usually not necessary if you stir gently.
- Don't Overmix: When folding the whipped cream into the Dr Pepper mixture, be gentle. Overmixing will deflate the air you’ve worked hard to incorporate, leading to a denser, less creamy ice cream.
- Airtight Storage: Store any leftover ice cream in an airtight container to prevent freezer burn and maintain its creamy texture.
- Serving Suggestions: This ice cream is fantastic on its own, but it also makes an incredible ice cream float! Simply add a scoop to a glass and top with more cold Dr Pepper. You can also crumble some cherry-flavored cookies on top or add a sprinkle of chopped toasted almonds for extra texture and flavor.
- Experiment with Variations: Feel free to customize! A pinch of cinnamon or a tiny dash of almond extract could further enhance the unique Dr Pepper profile. Adding fresh or frozen chopped cherries during the folding stage can also introduce a lovely burst of fruit.
Conclusion
Making your own
dr pepper ice cream is more than just a recipe; it’s an experience. It’s a delightful journey back to the joy of simple pleasures, elevated by a surprising twist of flavors. The unique blend of Dr Pepper’s 23 secret ingredients, harmoniously balanced with the rich creaminess of a no-churn base, creates a dessert that is both nostalgic and excitingly new. So, next time you're craving something truly special, skip the store-bought options and whip up a batch of this fantastic homemade treat. You'll be amazed at how easy it is to create such an extraordinary dessert, guaranteed to bring smiles and satisfy even the most discerning sweet tooth. Indulge in the magic, share the joy, and let this Dr Pepper ice cream become your new go-to favorite!